Aciduino
A cheap Roland TB-303 step sequencer clone with basslines generator and MIDI controller aimed at live interaction. Your acid lines for a very low cost.
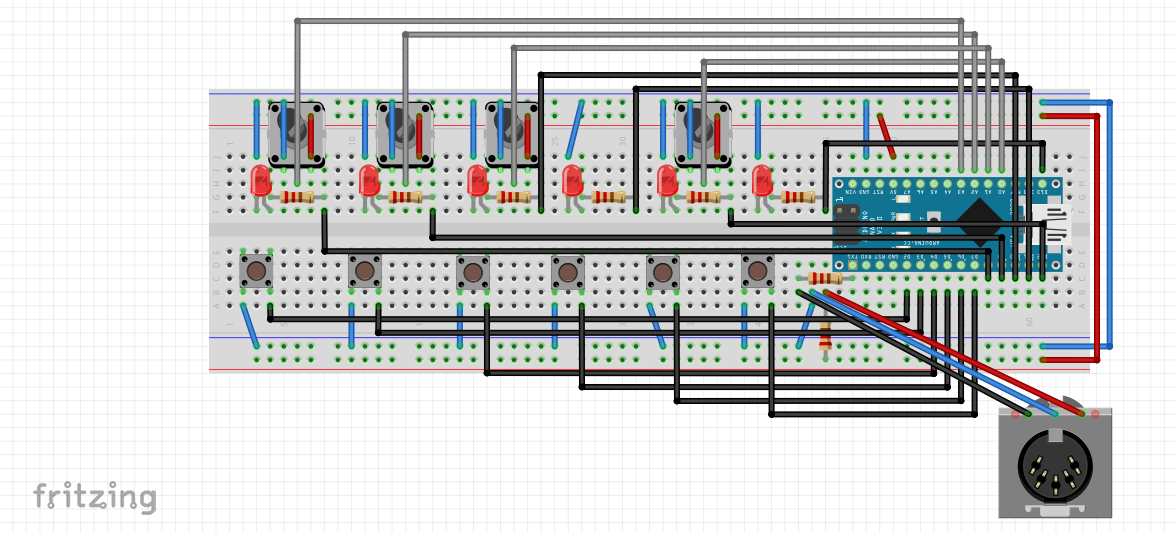
Build it on a protoboard or use the MK2 PCB designed by community contributors.
Features
303 Step Sequencer
- 2 tracks of classic TB-303 sequencing
- 14 non-volatile pattern memory slots
- Rest, tie, glide, and accent per step
- Per-track pattern length — 1 to 16 steps
Generative Engine
Generate harmonized acid lines at the press of a button:
- Pick a harmonic mode (scale)
- Set low/high note range
- Press generate for infinite fresh sequences
- Shift steps left/right
MIDI Controller
Control up to 6 synth parameters per track with CC messages. Two banks (A/B) per knob expand your reach.
MIDI Clock
Tight, solid internal MIDI clock — or receive external sync as a slave.
User Interface
Aciduino has 3 page modes plus a page select screen. The controls are 4 knobs (potentiometers) and 6 buttons with LEDs.
Page Select
Press button 1 + button 2 together at any time to enter page select. The page LEDs blink to indicate you're in this mode.
| Control | Function |
|---|---|
| knob 1-4 | — |
| button 1 | Track 1 (LED = selected) |
| button 2 | Track 2 (LED = selected) |
| button 3 | Live mode |
| button 4 | Generative mode |
| button 5 | Step edit |
| button 6 | Play / Stop |
Use track 1 / track 2 to choose which track to edit or play. The active track has its LED on.
Page 1 — Live Mode
| Control | Function |
|---|---|
| knob 1 | Ctrl 1 (CC A/B) |
| knob 2 | Ctrl 2 (CC A/B) |
| knob 3 | Ctrl 3 (CC A/B) |
| knob 4 | Pattern length / Global tuning |
| button 1 | << Pattern |
| button 2 | Pattern >> |
| button 3 | Ctrl A/B toggle bank |
| button 4 | << Tempo |
| button 5 | Tempo >> |
| button 6 | Play / Stop |
| hold button 1 | Save pattern (hold until LED blinks) |
| hold button 2 | Delete pattern (hold until LED blinks) |
- Pattern buttons 1 & 2: LED on at navigation boundaries (first pattern → LED 1, last pattern → LED 2)
- Ctrl A/B: toggle between two CC banks per knob. LED off = bank A, LED on = bank B
- Global tuning: transpose from -12 to +12 semitones
Page 2 — Generative Mode
| Control | Function |
|---|---|
| knob 1 | Low note range |
| knob 2 | High note range |
| knob 3 | Number of tones |
| knob 4 | Number of notes |
| button 1 | << Scale (harmonic mode —) |
| button 2 | Scale >> (harmonic mode +) |
| button 3 | Generate fresh sequence |
| button 4 | << Shift (steps left) |
| button 5 | Shift >> (steps right) |
| button 6 | Play / Stop |
- Turning knobs does not modify the current sequence — it sets parameters for the next generation
- Navigate scales: Ionian, Dorian, Phrygian, etc. LED on for scale — means no harmonic context
- Default harmonize is off; press Scale >> once to enter Ionian
Page 3 — Step Edit
Program step by step, just like the original TB-303, using knobs instead of a keypad.
| Control | Function |
|---|---|
| knob 1 | Octave selection |
| knob 2 | Note selection |
| knob 3 | Tuning / slide time |
| knob 4 | Step length (1–16) |
| button 1 | << Step (previous) |
| button 2 | Step >> (next) |
| button 3 | Rest toggle |
| button 4 | Glide / Tie toggle |
| button 5 | Accent toggle |
| button 6 | Play / Stop |
- LED 1 on = first step selected. LED 2 on = last step selected
- Rest, glide/tie, and accent buttons toggle the state of the selected step
- Step length sets sequence length from 1 to 16 steps
Slave Mode
Press and hold Play / Stop until its LED turns ON to sync to an external master clock (MIDI input required).
Press and hold again until the LED turns OFF to return to master mode.
MK2 PCB
ijnekenamay designed a purpose-built PCB for the Aciduino, adding MIDI input for slave sync.
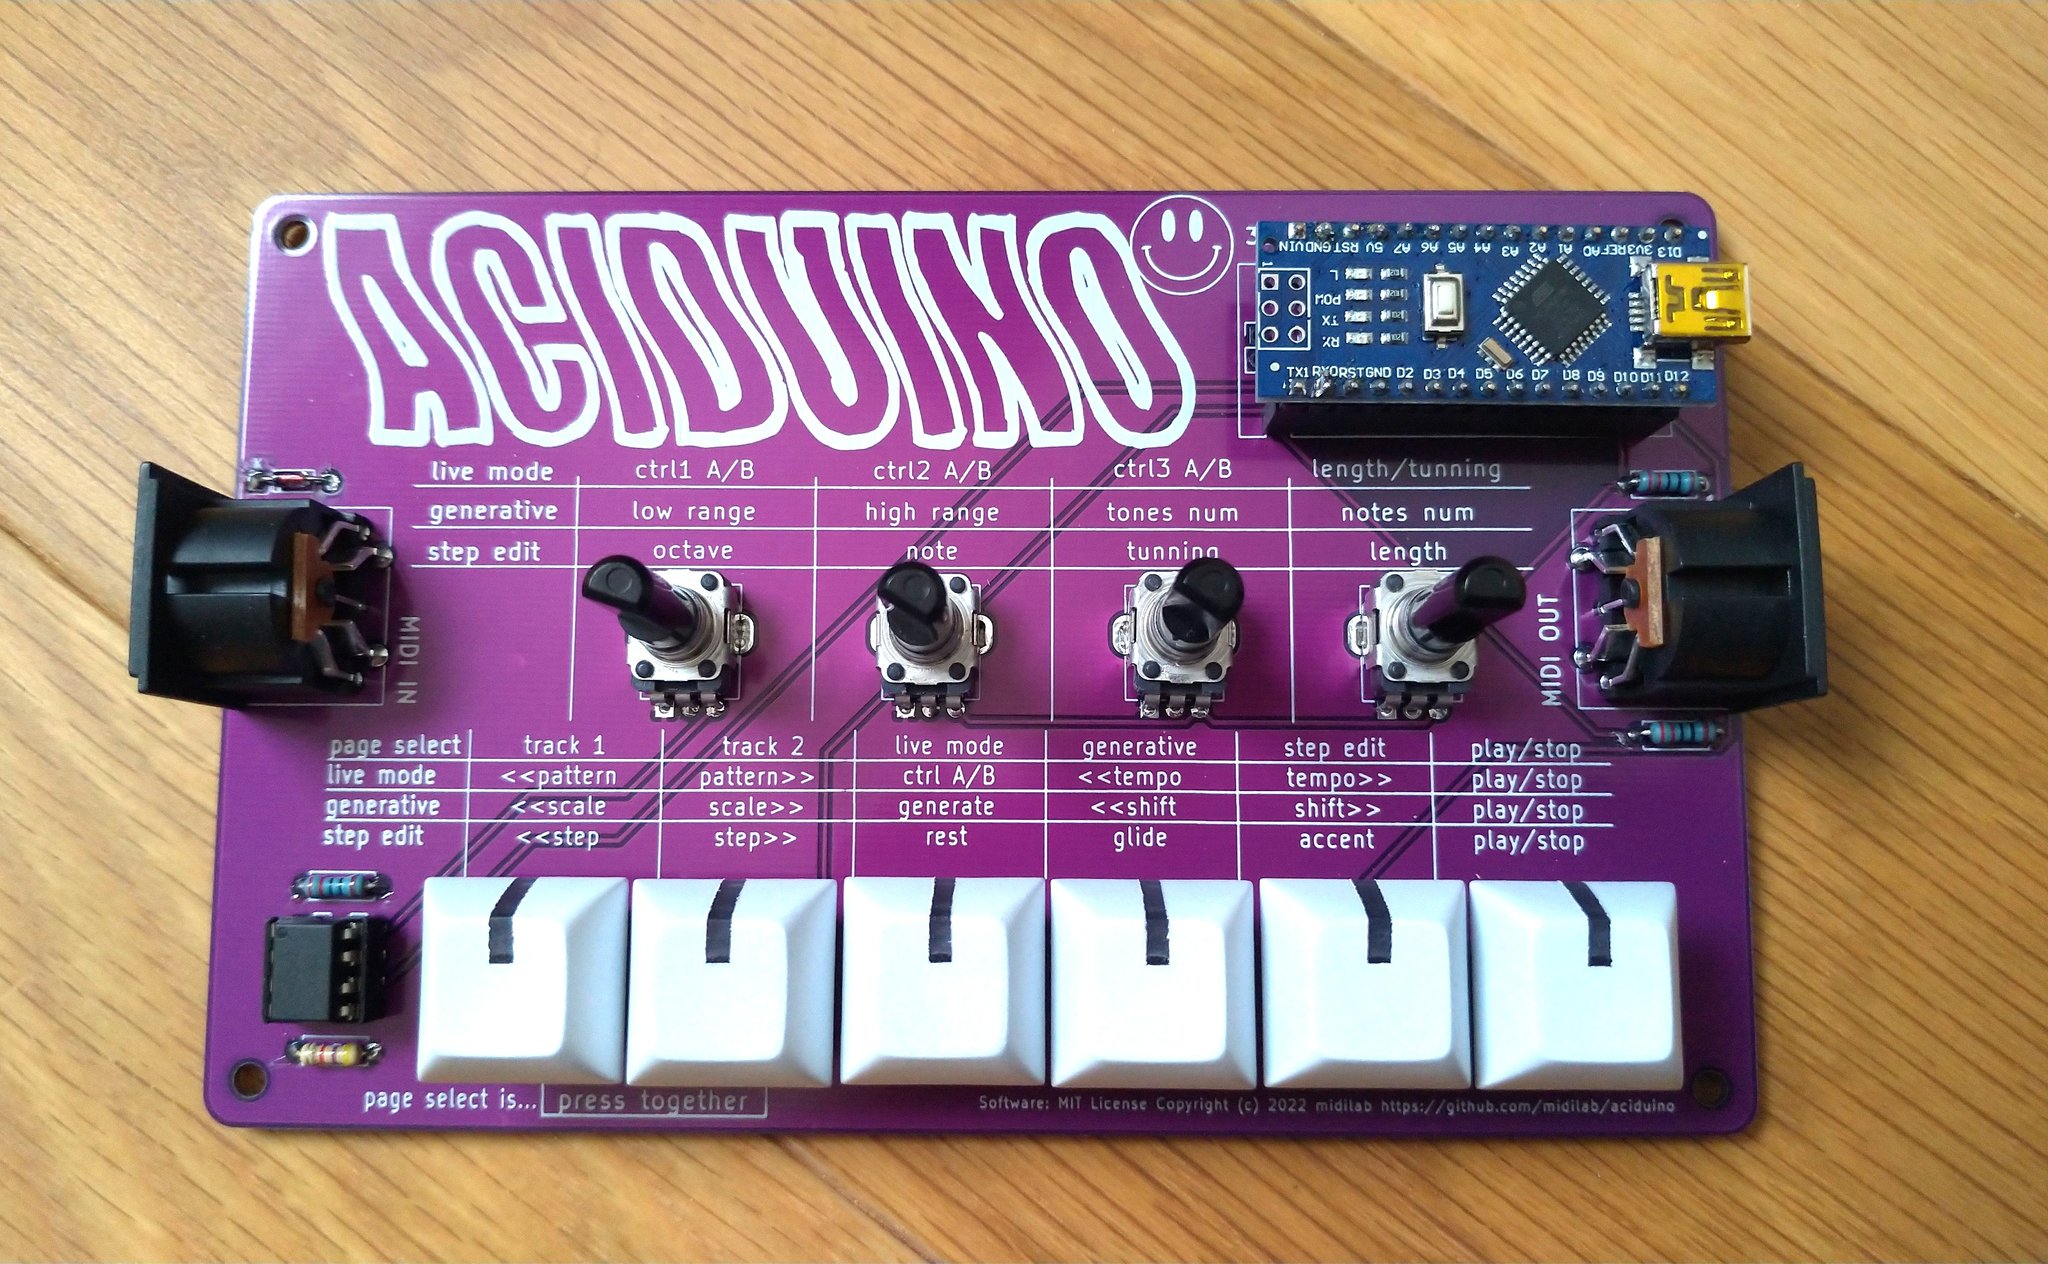
Fabrication
Download the Gerber files from the aciduino hardware folder and submit to any PCB fab house (JLCPCB, PCBWay, etc.) — typically comes in batches of 5.
MK2 BOM
| Part | Quantity |
|---|---|
| Arduino Nano | 1 |
| 220Ω resistors | 10 |
| 4.7kΩ resistor | 1 |
| 1N4148 diode | 1 |
| 6N138 optocoupler | 1 |
| Key switches (or 6mm tactile) | 6 |
| 3mm diffused LEDs | 6 |
| 10k linear potentiometers | 4 |
| 5-pin DIN MIDI connectors | 2 |
- 9V battery box pads on PCB (also powers via Arduino USB)
- Demo with modular and Polyend Tracker
Protoboard BOM
For the original solderless breadboard build:
| Part | Quantity |
|---|---|
| Arduino Nano | 1 |
| Solderless breadboard (830 tie points, 2 buses) | 1 |
| Jumper wire kit | 1 |
| 220Ω resistors | 6 |
| 6mm tactile switches | 6 |
| 3mm diffused LEDs | 6 |
| 10k linear potentiometers | 4 |
MIDI Connection
Add 2 × 220Ω resistors and choose one:
- 5-pin DIN female connector (standard MIDI, requires soldering)
- Cut MIDI cable — strip and connect directly to protoboard (tin the tips first)
USB Connection
- Open
config.hand setMIDI_MODEto1 - Install Hairless MIDI Serial Bridge
- Open your DAW, route MIDI to the serial bridge port
- You may need a virtual MIDI port driver depending on your OS
Configuration
Edit config.h to adapt the firmware to your setup — pin mappings, MIDI mode, clock source, and more.
Dependencies
Built on the uClock library for precise BPM clock generation — included in the project for easy compilation.